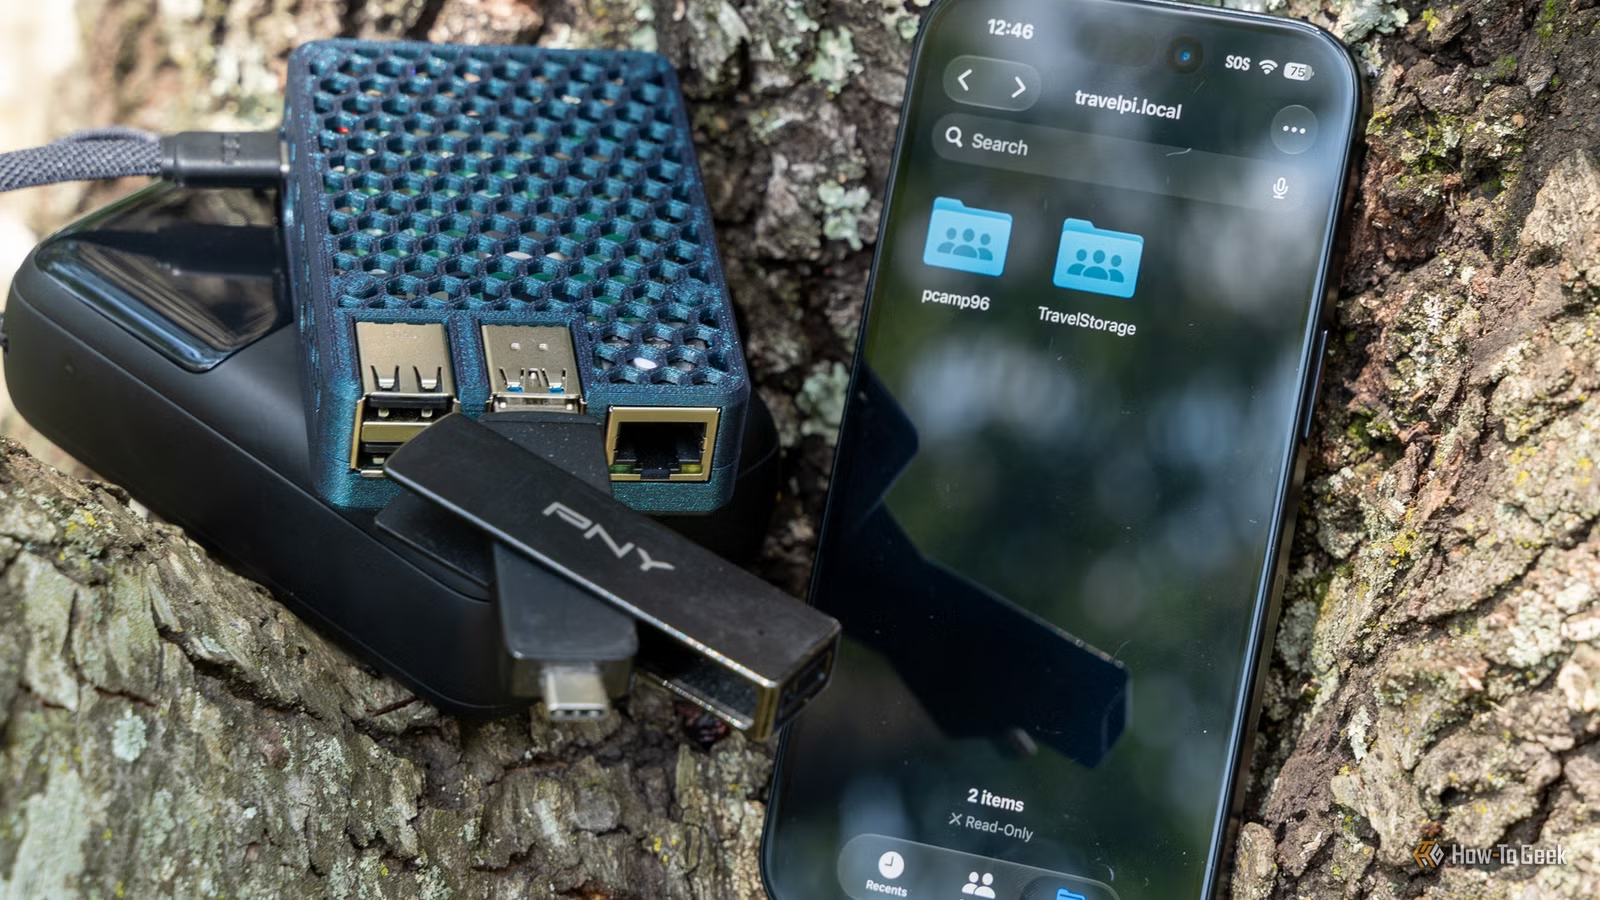
My aim was to create a portable, battery-powered Network-Attached Storage (NAS) that I could easily travel with. To achieve this, I repurposed my Raspberry Pi 4 B, which turned out to be the ideal choice for my TravelPi project.
I wanted a portable NAS rather than a typical USB drive
Accessing files without a computer nearby
This year, I’ve traveled extensively, finding myself in situations where I needed file access from various drives but couldn’t connect them to my phone for various reasons. At home, I rely on a substantial NAS that I can access through SMB or NFS, ensuring speedy and convenient file retrieval. However, while I can technically access my home NAS via VPN remotely, it’s neither fast nor practical, prompting me to create a portable version.
A portable NAS will offer less storage than my home setup, but that’s perfectly acceptable. During my travels, I can utilize my 1TB and 2TB external SSDs as temporary NAS storage. This allows me to upload files back to my main NAS whenever I find a decent internet connection, or easily wait until I return home.
The Raspberry Pi as a solution for portable storage
Its low power consumption, available I/O options, and Wi-Fi hotspot capability
I opted for a Raspberry Pi 4 B since I already had one available, and it met all the criteria I was looking for. It features USB 3.0 and gigabit Ethernet, both of which were essential for my project.
This Raspberry Pi is powered by USB-C, enabling me to run it off a portable power bank when necessary. Its Linux environment simplifies the setup process, so I set out to build a tailored system and called it TravelPi.
At the core of TravelPi is FileBrowser Quantum and the SMB protocol. I compiled all the necessary files and setup instructions in a straightforward repository for anyone interested in replicating my setup.
After testing it in various environments—home, on the go, powered by standard USB-C and a battery—I found it to work brilliantly.
A standout feature of the TravelPi project is that it uses Avahi to establish a local mDNS hostname for the device. Instead of having to search for the Raspberry Pi’s IP address, I simply type ‘travelpi.local’ to connect.
TravelPi is configured to create a Wi-Fi hotspot under the SSID ‘TravelPi’, which is secured with a password that I set up during installation. This allows direct connections from my phone or laptop for easy file browsing.
However, since the Wi-Fi is not optimal for larger file transfers, I’ve enabled a link-local Ethernet backup. By connecting an Ethernet cable between my computer and the Pi, I can achieve a fast local connection, still accessible via ‘travelpi.local’. This enables file transfers at gigabit speeds without needing a separate network connection or router.
If connected to a traditional network, TravelPi is recognized as ‘travelpi.local’ across systems on that network. It’s worth noting that I’ve configured it to use a protected SMB share, ensuring that even if mounted on the network, access isn’t granted without the correct password.
This setup allows me to access files regardless of my location. For instance, while on a photo shoot in the woods, I can transfer files directly from my SD card to my phone, tablet, or laptop without needing any additional equipment, as long as I have a portable power bank.
Backing up files without saving them to my devices
A web-based file manager simplifies file transfers
What I appreciate most about TravelPi is its operational efficiency in managing files. Using SMB for file transfers could create unnecessary delays, especially if backing up files from an SD card to an external SSD connected to the Pi, as it might attempt to route files through my phone first.
This is why I chose FileBrowser Quantum as the primary method for file management. It allows me to directly upload or download files via a web browser at ‘travelpi.local:8080’ or manage files internally between the storage devices on the Pi.
This approach means that files from the SD card can be easily backed up to the SSD without ever needing to touch my phone, streamlining the entire process.
FileBrowser Quantum also provides a straightforward way to navigate through the Pi, eliminating the need to mount it via SMB on my phone. I simply access it through a web interface.
Custom builds lead to the best projects
While I could have likely found a pre-existing project that met my needs, I relished the challenge of building it myself and now have the flexibility to customize it further. For instance, I’m contemplating installing rsync on the Pi for configuring cloud backups when it connects to the internet.
Sometimes, the most effective solutions arise from DIY efforts rather than relying solely on existing options.